
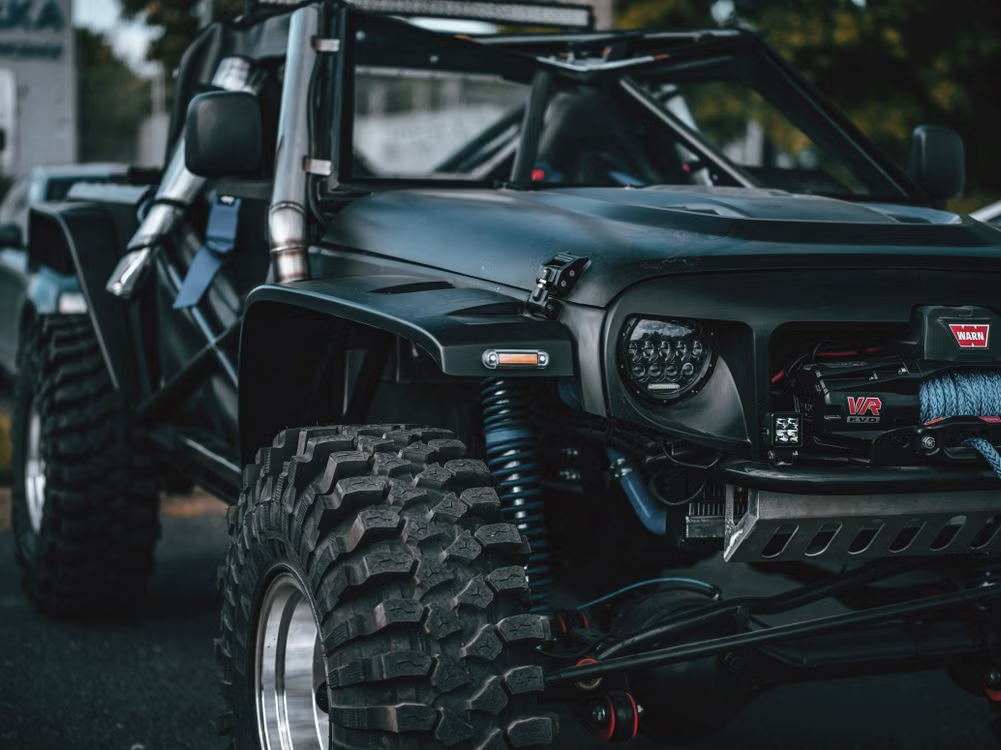
When you want to upgrade 4×4, truck, or off-road machine for very brutal terrain, standard factory parts must be changed. Severe off-road trails throw heavy impact, big vibration, and high frame flex directly to chassis, suspension, and driveline of vehicle. Thin skid plates, light-duty steering links, and stamped-steel brackets from factory bend or crack fast under hard punishment of trail. Custom heavy-duty fabrication parts can reinforce weak structural points, gain more ground clearance, and make the rig ready for tough off-grid trips.
For building reliable off-road rig with good capability, careful planning, basic mechanical understanding, and accurate execution during fitment are needed. When sourcing tabs, brackets, gussets, and builder hardware for custom projects, checking organized product catalogs—like custom parts from FRDM Fabs -gives good reference for comparing steel thickness, axle bracket fitment, and mounting bolt choices. Systematic approach in choosing components and welding work keeps vehicle modifications safe, durable, and fully working on trail.
Step 1: Finding Weak Spots and Planning Modifications
Before buying raw fabrication parts or starting frame cutting, do detailed inspection to see which areas need extra strength. If you modify a rig without clear layout, suspension binding, bad handling, or fast part failure will happen.
Common Areas Needing Reinforcement
- Axle Housings: Factory axle tubes flex or bend easily when landing jumps or crawling big rocks. Axle trusses welded on top stop housing flex and keep internal gears aligned properly.
- Control Arm Brackets: Stock mounting points mostly use thin sheet metal. Replacing them with thick steel brackets prevents tearing during high suspension articulation.
- Frame Rails: Moisture inside boxed sections or older truck frames causes stress cracks and rust easily. Weld-on frame stiffeners spread force across a wider surface.
Measuring Alignment and Suspension Movement
- Check Full Compression Clearance: Lift suspension completely with jack when springs are removed to make sure custom brackets do not hit steering linkages, oil pan, or brake lines.
- Verify Articulation Limits: Move suspension through the whole travel range so drive shaft does not bind and shocks do not bottom out before hitting bump stops.
Step 2: Choosing Metal Alloys and Bolt Grades
Structural strength of custom off-road parts depends mostly on chosen materials. Correct metal type and wall thickness selection prevents fatigue cracks and total part failure under heavy load.
Comparing Carbon Steel and Alloy Options
- Mild Steel (A36 / HREW): Easy for cutting, bending, and welding with basic MIG welder setup. Best for simple brackets, bumper shells, and non-critical skid plates.
- DOM Tubing (Drawn Over Mandrel): Has seamless construction and very even wall thickness. Essential for steering links, roll cages, and suspension control arms that need maximum torsional strength.
- Chromoly Steel (4130): High-strength alloy steel that offers amazing strength-to-weight ratio. Needs careful TIG welding and proper heat treatment so weld seams do not become brittle.
Hardware Grade Standards
Never put old stock bolts back on custom heavy-duty brackets.
- Grade 8 Fasteners: Identified by six radial lines on bolt head. Hardened carbon steel bolts like these handle high tensile loads, so they are mandatory for suspension mounts and winch plates.
- Class 10.9 Metric Bolts: Equivalent metric version for Grade 8 standard hardware, offering high shear resistance on modern truck platforms.
Step 3: Preparing Metal Surfaces and Making Clean Welds
For making strong and safe welds on vehicle frame or axle housing, meticulous surface prep work is required. Paint, rust, oil, and mill scale ruin the weld pool, creating air pockets and weak joints.
Surface Cleaning Steps
- Grind to Bare Metal: Use flap disc or wire wheel to remove all paint, rust, and scale at least one inch back from the welding area.
- Degrease Joint: Wipe bare steel with acetone or brake cleaner to strip away hidden oil residues completely.
Tack Welding and Holding Parts
- Use Mock-Up Tabs: Hold brackets in place with strong welding magnets or heavy C-clamps during test fitting.
- Put Small Tack Welds First: Secure components with small tack welds initially. Check alignment angles and clearances again before doing final continuous weld passes.
- Manage Heat Input: Switch welding sides on axle tubes and frame sections to prevent heat warping. Too much localized heat warps axle shafts or twists frame rails out of alignment.
Step 4: Applying Protective Coatings Against Corrosion
Bare steel oxidizes very quickly when exposed to humidity, rain, and road salt. Adding durable finish protects custom metalwork and extends part lifespan significantly.
Cleaning and Priming Raw Steel
- Clean Off Weld Slag: Use wire brush or chipping hammer to knock off all weld spatter and flux leftovers.
- Spray Self-Etching Primer: Cover raw steel with self-etching primer designed to bite into bare metal, creating rust-resistant base coat.
Topcoat Choices for Off-Road Use
- High-Impact Spray Paint: Standard enamel or bedliner spray paint costs little and is easy to touch up on trail after scraping rocks.
- Powder Coating: Gives thick, tough, chemical-resistant finish best for removable brackets, skid plates, and suspension arms. Avoid powder coating parts welded directly to the frame, because touching them up later is very difficult.
Step 5: Regular Trail Checks and Post-Trip Maintenance
Off-road driving puts custom fabrications under continuous vibration and heavy shock loads. Performing routine checks helps find loose bolts or fine stress cracks before trail breakdowns happen.
- Check Bolt Torque After 50 Miles: Re-tighten all suspension bolts, steering links, and custom bracket hardware after initial drive, and again after first hard trail ride.
- Check Weld Seams for Cracks: Look closely at welded joints near suspension mounts for flaking paint or rust lines, which show micro-fractures in weld metal directly.
- Clean Mud and Salt Fast: Wash accumulated dirt, mud, and road salt out from inside frame rails and off custom brackets so hidden moisture pockets do not rust steel from inside out.
Summary Checklist for Custom Off-Road Fabrication
- Audit Structural Weak Points: Inspect frame, axles, or suspension to find zones needing extra strength.
- Select Suitable Materials: Use DOM tubing for links, heavy steel plate for brackets, and Grade 8 hardware for fasteners.
- Prep Welding Surfaces: Grind every joint area down to bare, spotless metal before tacking brackets into position.
- Verify Suspension Geometry: Cycle suspension completely to confirm clearances and prevent binding before final welding.
- Apply Corrosion Protection: Seal raw metal using self-etching primer followed by tough topcoat paint.
- Perform Post-Trail Audits: Check welds for hairline stress cracks and re-torque mounting bolts after every big off-road run.







Add comment